In this lesson you create an agent, hold a conversation with it, give it a Task, and watch it carry the Task out. It takes about ten minutes, and nothing in it touches your website: a new agent may read and write files on your drive, but it cannot put anything live until you give it that permission (15.2).
The lesson follows Landotronix, a small business with a website, whose owner wants an assistant to draft a short welcome message for new customers.
You need only your Gridtop, signed in and open (chapter 2). You do not need an account with any AI provider: your first agent thinks with Ethocana, the house model that comes with Gridtop.
Your first sign-in. A new, empty Gridtop opens the app drawer and shows a short welcome. Start with a sample places a small example board: an agent, Welcome Writer, with a Task and a Skill connected to it, a Workflow and a Blueprint, so you can see what the pieces look like; you can remove it at any time (chapter 9). Start empty leaves the grid clear for this lesson, and Open the manual opens this book. The welcome appears once, and never over a grid that already holds something.
Your agent now exists, with a folder of its own on your drive (4.7), and is ready to talk.
Your new agent starts on Ethocana, with the general-purpose preset Flat (Default) and a plain instruction to be a balanced, helpful assistant. Leave it so for this lesson. When you are ready for more demanding work, connect a larger model from an AI provider and move your agent onto it (chapter 13, and 13.7 for the chips that change an agent's model).
You speak to an agent through its chatbox.
Your message appears in the conversation, and the agent's reply begins with Engaged... while the model works, then fills in as the words arrive. Beneath your message, a short activity list shows each step, such as Prompt received and Model request, each ticked when done. To stop the agent before it has finished, click the send button, which reads Stop while the agent works; the words already written are kept.
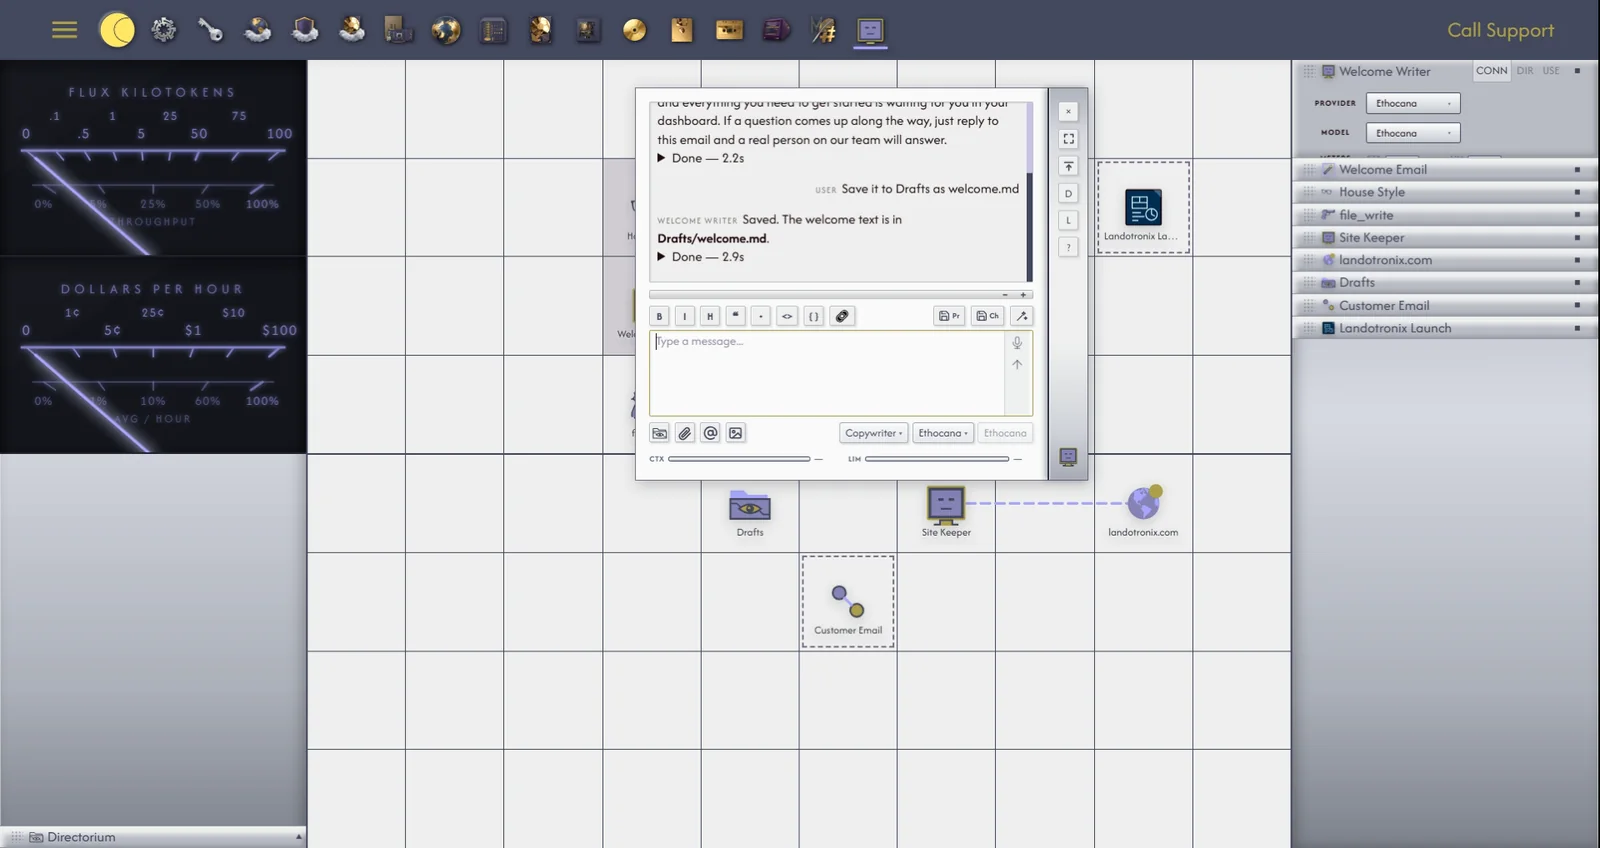
A conversation is one way to work with an agent. A Task is another: a standing piece of work, written down once, that the agent can be given, return to, and carry out again. Tasks sit on the grid as objects of their own, connected to the agents that do them.
The line between the agent and the Task is what joins them: from now on, the agent is told about its Task every time it works. Leave Max Steps blank for now; chapter 16 covers Tasks in full.
Return to the chatbox and ask: Please do your Task.
The activity list shows each step with the time taken so far, such as Working — 3.2s. When the agent uses one of Gridtop's tools, for example to save its draft to a file, the step reads Requested and the tool's name, and a line in the reply records what the tool did and whether it succeeded. You can see what your agent did, in the order it did it (chapter 19).
Every agent is kept in a folder of its own at A:/Agentic Matrix/Gridtop/, under the agent's name. Inside is a file named for the agent and ending .agent, which holds everything about it: its provider and model, instruction and preset, tuning, linked files, permissions, memory, and its Tasks and Skills. Gridtop writes this file for you as you work.
To see the folder, right-click your agent and choose Open Folder; press ESC to return to the grid.
Because your agent is a file, it is safe even if its icon leaves the grid. If you Remove the icon (9.1), the file stays where it is, and you can bring the agent back by dragging its .agent file from the File Directory onto an empty cell.
You have now created an agent, spoken with it, given it work and watched it carry the work out. The rest of this manual builds on these steps.