Your Gridtop belongs to your Autocomputing account. This chapter explains how to sign in and keep your account secure, how Gridtop is started, what the header menu offers, and how to leave Gridtop, cancel it, or change your mind.
One Autocomputing account opens three places with a single sign-in: login.autocomputing.host, where you sign in; your dashboard, at dashboard.autocomputing.host, where your hosting, billing and services are managed; and Gridtop, at gridtop.autocomputing.host, which you open from your dashboard or directly.
If you have forgotten your password
If the code does not arrive within a few minutes, check your junk mail folder, then click Resend. Gridtop calls your password a passphrase in some places. It is the same thing; the word is a reminder that a short sentence you can remember is stronger than a short word you cannot.
Two-factor sign-in. A password alone can be guessed or stolen. Two-factor sign-in adds a second proof that it is you: a six-digit code from an authenticator app on your phone, which changes every thirty seconds and exists nowhere else. When it is on, Gridtop asks for the code after your password, once a day on each device. We strongly recommend it. Some features, such as linking Ethocana (13.5), ask for a code as well.
Signing in with two-factor sign-in. After your password, the screen reads Verify: Enter the code from your authenticator app. Type the code into 6-digit code; Gridtop continues as soon as the sixth digit is in. Without your phone, click Lost your device? Use a backup code., and type one of your backup codes instead.
To turn two-factor sign-in off, return to Settings ▸ Account, click Disable, confirm your password, and click Disable 2FA.
Gridtop comes to an account in one of two ways:
The trial is free. We ask for your card at the start so that Gridtop continues without interruption when the trial ends; the first charge is made on the day the trial ends, and not before. Each account has one trial. The price, the length of the trial and any offer that applies are always shown in Services when you decide, and we send a welcome email when your Gridtop is ready.
Once Gridtop is on, its row in Services shows its status (Trial until a date, Active, Payment missed or Included) and a Launch Gridtop button. Your drive is created when Gridtop starts, and it is yours from then on.
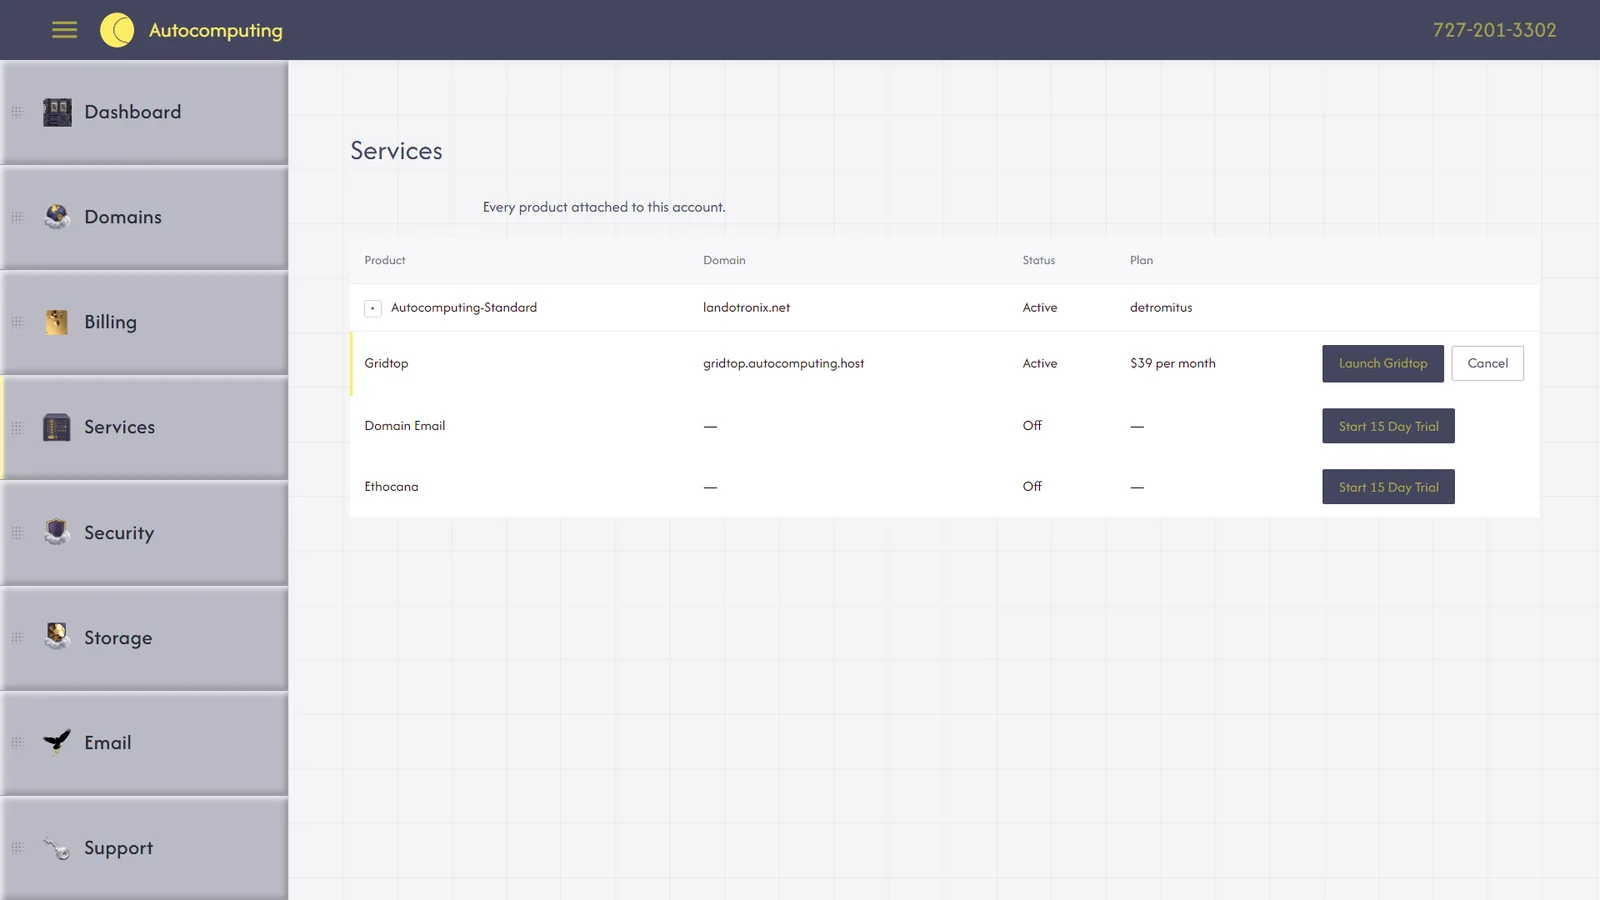
If you open Gridtop on an account without it, or after the subscription has ended, Gridtop does not open. In its place you see Enable Gridtop Add-on In Services, with a Go to Services button that takes you to the right place in your dashboard.
Nothing on your drive is lost while Gridtop is locked. After a subscription ends, your files remain available to download for 30 days (Gridtop Service Terms §12); start Gridtop again within that time, and it returns as you left it.
The menu button (☰) at the left of the header opens the header menu. At its top is the email address you are signed in as. Beneath it:
The menu also shows Users and API Keys. These belong to features not yet available in 1.0-beta, and will be described here when they arrive.
Exit Gridtop shows Saving…, waits until everything has been saved, and then closes its tab. If your browser does not let a page close itself, you are taken to your dashboard instead. If the save cannot be completed, for example because your connection has dropped, Gridtop says Could not save your Gridtop. Choose Exit again to leave anyway.; a second Exit Gridtop leaves without that last save.
Exit Gridtop does not sign you out. Your dashboard, and any other tab signed in to your account, stay as they are, and on a computer you trust you can open Gridtop again tomorrow without signing in. On a shared computer, sign out from your dashboard as well.
You can cancel the Gridtop add-on yourself, at any time, from Services in your dashboard. We ask you to choose a reason from a short list, and you may add a few words; it helps us improve, and delays nothing.
Cancelling stops the next renewal, and nothing more. Nothing ends early and nothing is refunded: Gridtop stays on until the end of the period you have paid for, and Services shows the date. If you cancel during your trial, the trial ends on its own date, and you are not charged. Until that date you can change your mind: choose Resume in Services, and the subscription carries on.
After the end date, Gridtop shows the locked screen (2.3), and your files remain available to download for 30 days.
If anything in Services does not go as expected, call us at (727) 201-3302.
Your Gridtop has two halves. The half you see, the page with its grid, windows and menus, comes to your browser from gridtop.autocomputing.host, and it is the same page for every customer. The half that does the work runs inside your own hosting account, beside your website: your A:/ drive, your agents' conversations and their use of your files, your schedules, your provider keys, your usage records, and everything that reaches into your website and its databases.
Each account's working half runs separately, in its own hosting account, and this protects you in three ways:
Because the working half lives in your hosting account, Gridtop needs a hosting account to run in. When your hosting is ready, your Gridtop is set up inside it automatically, and when we improve Gridtop we bring your account's half up to date ourselves.